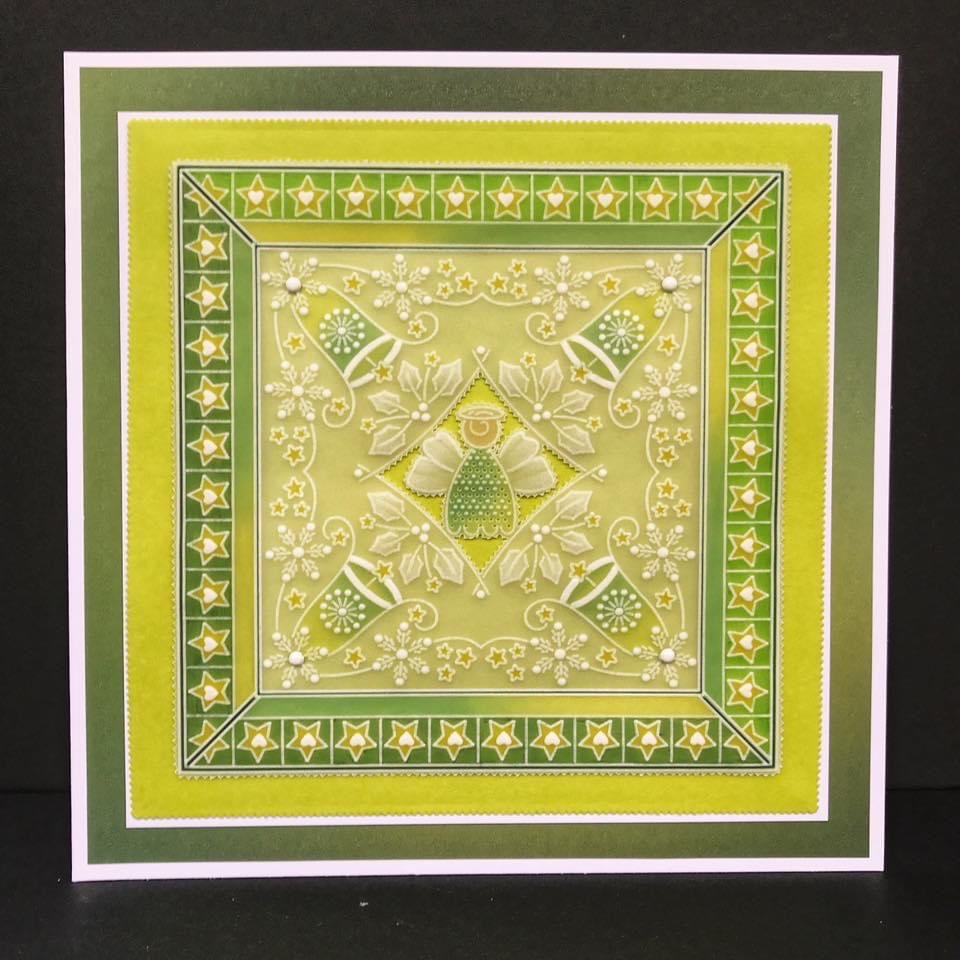
Here is the step by step for the card I demo-ed on Create and Craft on Saturday, 20/8/22, at 5pm using the Christmas Parchlets Collection of Groovi plates ...

Groovi Plates:
Deluxe Groovi Plate Starter Kit + Butterfly Wreath A5 Square Plate GRO-SK-40709-XX
Nested Squares Picot Cut Die Set & Groovi Plate ACC-DI-30698-66
Tina's Christmas Parchlets Collection A6 Square Groovi Baby Plate Set GRO-CH-41285-01
Mini Straight & Diagonal Basic Bold A6 Square Groovi Piercing Grids GRO-GG-41099-23
NOTE:
All the embossing on this project is done on the back.
The colouring on this project is done on the back.
All the perforating and cutting on this project are done from the front.
Step 1: Emboss the frame and corners (leaving out the snowflakes inside the bells) from the Christmas Snowflake Parchlet plate in the Tina's Christmas Parchlets Collection - the circles using the Groovi No.2 tool (or Pergamano 1.5mm embossing ball tool) and the rest of the line art using the Groovi No.1 tool (or Pergamano 1mm embossing ball tool).

Step 2: Emboss the wreath from the Christmas Candle Parchlet plate in the Tina's Christmas Parchlets Collection using the Groovi No.1 tool (or Pergamano 1mm embossing ball tool).

Step 3: Emboss the angel from the Christmas Angel Parchlet plate in the Tina's Christmas Parchlets Collection using the Groovi No.1 tool (or Pergamano 1mm embossing ball tool).

Step 4: Outside the square, emboss part of the frame from the Christmas Stockings Parchlet plate in the Tina's Christmas Parchlets Collection - the circles using the Groovi No.2 tool (or Pergamano 1.5mm embossing ball tool) and the rest of the line art using the Groovi No.1 tool (or Pergamano 1mm embossing ball tool).
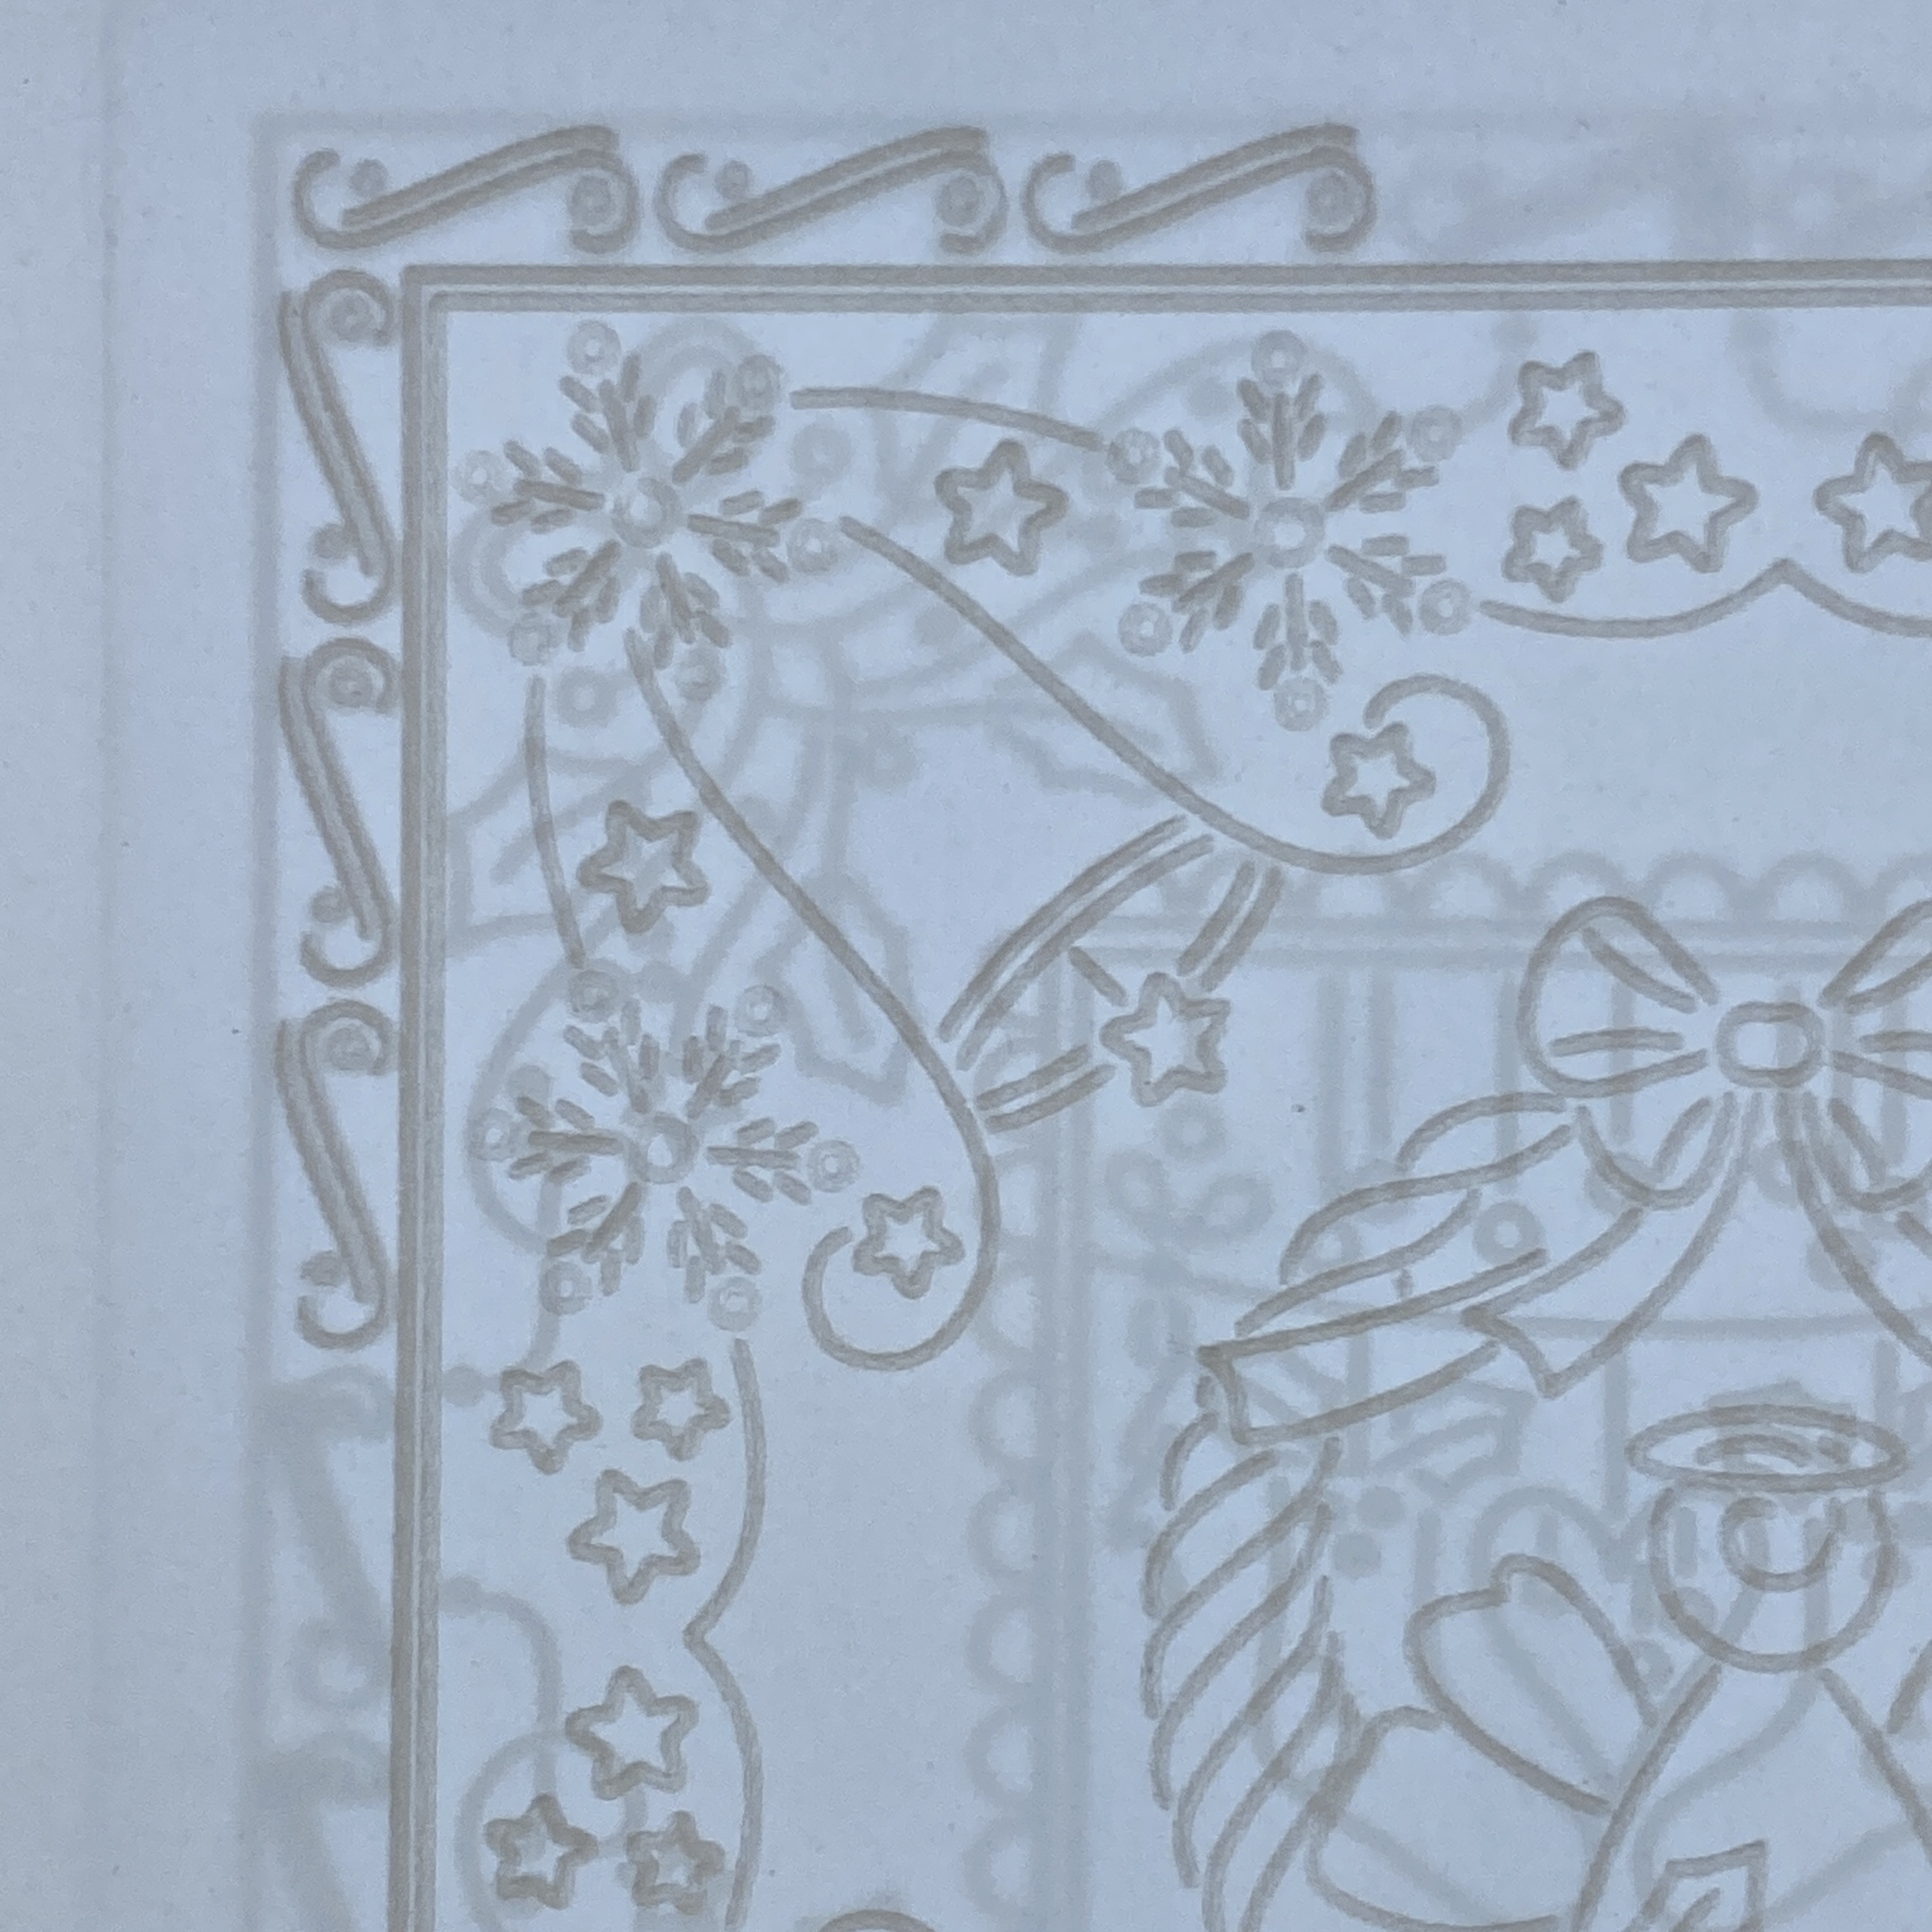
Step 5: Over the Mini Diagonal Piercing Grid, using Groovi No.2 tool (or Pergamano 1.5mm embossing ball tool), emboss dots in the Angel's dress and a line above the head to the bow for the 'string'.

Step 6: Using the Groovi No.3 and No.4 tools (or Pergamano 1.5mm and 3mm embossing ball tools) gently emboss inside circles and angel wings starting with the largest ball tool and remembering to let the parchment rest between layers.

Step 7: Still working on the back, colour with Perga Colours Exclusive pens.

Step 8: From the front, over the super foam, using Pergamano bold 2-needle perforating tool, perforate inside the wreath, bells and outside the main card.

Step 9: Picot cut between all the perforations making sure the scissors are over the waste when you cut.

To Finish: Add as much or as little (or none) Perga glitter as you wish.
Using the Nested Squares Picot Dies, cut the 5th and 3rd largest picot square from designer paper (I have used Antarctica) and the 4th largest picot square from white card.
Mount the parchment piece and smallest designer paper picot square die cut using brads.
Layer, mount and stick all the pieces on to the folded white card.
Here are another couple of photos of samples created using these Christmas Parchlets Collection.

Groovi plates and ingredients are available on http://www.claritystamp.com.
Sending everyone STAY SAFE WISHES sprinkled with PERGA GLITTER. Take care.
Lots of Love, Hugs and Laughter
Tina x