Sunday 17 April 2022

Say It With Flowers 3

Good morning/afternoon/evening depending on where everyone reading this is at the moment.

Today I am offering you fun step by step design using what I call my 'Oopsie' plate. It is not actually called that but I call it that because whenever I am not focused and/or get distracted (by cake, chocolate and popcorn, I get icky marks on my parchment, or put a hole somewhere I wasn't supposed to, or get the letters the wrong way round, or drop my felt pen on my work with the lid open (of course!), etc), I say out loud an 'Oopsie Daisy' and the flowers and butterflies are very handy to cover up those 'Oopsies'. However, it is a plate on it's own too as you use the flowers for 3D embellishments on your art work and also create borders.

For this project we will put 3D flower elements which have been embossed (with A LOT of patience on my part which is not my strong point!) over the larger textured flowers on the main piece.


Groovi Plates:
Groovi Plate Starter Kit Deluxe  GRO-SK-40571-XX
Alphabet & Numbers A4 Square Groovi Plate Mate  GRO-WO-40875-21
Nested Squares Picot Cut Die Set & Groovi Plate  ACC-DI-30698-66
Tina's 3D Flowers & Butterflies A4 Square Groovi Plate  GRO-FL-40553-15
Tina's Rosie Doodle Border Groovi Border Plate  GRO-FL-40832-09
Straight Pattern No.2 Groovi Border Piercing Grid  GRO-GG-40351-14
Straight Basic Bold Groovi Border Piercing Grid  GRO-GG-40384-14
Diagonal Basic Bold A5 Square Groovi Piercing Grid  GRO-GG-40201-12

NOTE: 
All the embossing on this project is done on the back.
The colouring on this project is done on the back.
All the perforating and cutting on this project are done from the front.  

Step 1: Die cut the 4rd largest nested picot square on regular parchment paper using the Nested Squares Picot dies. Emboss the double outline from the matching Nested Picot Squares Groovi plate using the Pergamano 1mm embossing ball tool (or Groovi No.1).
Find it Here

Step 2: Using the Pergamano 1mm embossing ball tool (or Groovi No.1) emboss double outlines about just above half way inside the square from the Nested Picot Squares Groovi plate.

Step 3: From the Tina's 3D Flowers & Butterflies plate emboss 3 largest size flowers of the 2 flowers shown on the photograph below using the Pergamano 1mm embossing ball tool (or Groovi No.1)
Find it Here

Step 4: Emboss the border from the Tina's Rosie Doodle border plate using the Pergamano 1mm embossing ball tool (or Groovi No.1)
Find it Here

Step 5: With the front side up, using Groovi tabs, stick the parchment over the Straight Pattern No.1 Groovi Border Piercing Grid plate and perforate the border pattern using the 1-needle bold perforating tool.
Find it Here

Step 6: Turn the parchment to the back, using the Pergamano 1mm embossing ball tool (or Groovi No.1), emboss double below the perforated border from the Nested Picot Squares plate and border from the Tina's Rosie Doodle border plate. Emboss flower stems using the Nested Picot Squares plate.

Step 7: Still working on the back, using the Pergamano 1.5mm embossing ball tool (or Groovi No.2), emboss dots in the flower petals using the Diagonal Basic Bold plate.
Find it Here

Step 8: Still working on the back, align the perforated border over the Straight Basic Groovi Border plate and emboss dots between the perforations using the Pergamano 1.5mm embossing ball tool (or Groovi No.2).
Find it Here

Step 9: Colour on the back using Perga Colours Exclusive pens.

Step 10: Picot cut between all the perforations in the border making sure the scissors are over the waste when you cut.

Step 11: On a spare piece of parchment, emboss the corresponding smallest size flowers from Tina's 3D Flowers & Butterflies plate using Pergamano the 1mm embossing ball tool (or Groovi No.1).

Step 12: Emboss inside the flower petals using various size embossing ball tools starting with the largest and letting the parchment rest between each layer to avoid buckling and warping. The longer you let it rest between each layer, the better and whiter the results. This was my first layer ...

This was my last layer ...

Here are the steps for embossing I had done for one of my other projects previously and followed the same steps for this project.

Step 13: Turn the parchment to the front, using the 2-needle bold perforating tool, perforate outside the butterflies.


Step 14: Picot cut between all the perforations making sure the scissors are over the waste when you cut.

To Finish:
Using sequins and brad, mount your 3D flowers over the flowers on the main parchment piece through on Clarity designer paper. Stick this on 5"x5" folded white card.


I hope you enjoyed this step by step journey and I look forward to seeing all your #sayitwithflowers creations using these Groovi plates (and others). 

Groovi plates and ingredients are available on  http://www.claritystamp.com.

Sending everyone STAY SAFE WISHES sprinkled with PERGA GLITTER. Take care.

Lots of Love, Hugs and Laughter
Tina x

Saturday 16 April 2022

Say It With Flowers 2

Hiya. It’s me again.

It was so lovely to create the new Groovi artwork a couple of days ago. With the best of intention, I was going to create another card yesterday so we can #sayitwithflowers together but baking a cake won the toss! 

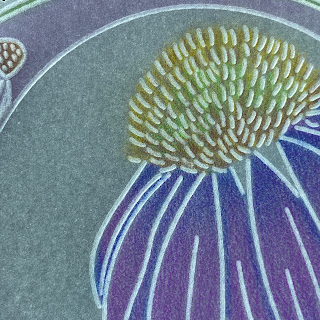
So instead, today I will share with you the steps to a card I had prepared for a workshop last year but life got in the way and I had to cancel. I love colour and more often than not I colour on the back of my work because I love the crisp white lines we get with the Groovi plates. But this workshop was going to be about colouring on the front for more vibrancy as when we colour on the back and the nature of the transluscent parchment makes the colours appear softer on the front. For today’s step by step, I have embossed the outlines but you can use this technique without embossing the outlines by placing the parchment to the smooth side of the Groovi plate. Here are 2 samples using the same flower from Linda’s 123 plate to show you the difference …


Groovi Plates:
Alphabet A5 Square Groovi Plate Mate GRO-MA-40002-07
Nested Scallops Circles A5 Square Groovi Plate GRO-PA-40558-03
Linda’s 123 - D Bumble bee, Clover & Coneflower A4 Square Groovi Plate GRO-FL-40989-15

NOTE: 
The outline embossing of the main element is done on the front and the rest on the back.
The colouring of the main element is done on the front and the rest on the back.
All the perforating and cutting are done from the front.  

Step 1: Emboss the 3rd largest double circle outlines (not the scallops) from the Nested Scallops Circles plate using the Pergamano 1mm ball tool (or Groovi No.1).

Find it Here

Step 2: On the front of the parchment, using the Pergamano 1mm ball tool (or Groovi No.1), deboss the circle and the largest floral design from Linda’s 123 plate.

(Embossing from the front is called debossing)

Find it Here

Step 3: Remove the parchment, turn it to the back and emboss the little flowers in the space between the circles using the Pergamano 1.5mm ball tool (or Groovi No.2) for the flower petals and the Pergamano 1mm ball tool (or Groovi No.1) for the leaves, stems and flower heads.


Step 4: Emboss the small flower petals on the back using the Pergamano 3mm and 1.5mm ball tools (or Groovi No.2 and No.3).

Step 5: On the back, colour the little flower heads, leaves and between the outside double circle outlines using the Perga Colours Exclusives.

(I have used PCE1, PCE16 and PCE21)


Step 6: Colour in the space between the circles with Perga Liner B pencil and blend using a
Dorso oil and blending nibs.
(I have used B5 and B14)

Step 7: Colour on the front:
Make sure the pencils are sharp.
Using very light feathering strokes, flick colour using the darkest colour from the centre to the outside as well as from the outside to the inside of each petal.
Flick some longer, some shorter strokes, about a 1/3 of the way, following the shape of each petal
(I have used B4).

Step 8: Using very light feathering strokes, starting at the top and going over the previous colour, flick colour, using the second medium colour, from the centre to the outside as well as from the outside to the inside of each petal. These will be longer flicks so the whole middle part of the flower gets filled (I have used B14).
N.B. If you are using a larger flower, you may need to use a third, lighter colour and repeat.

Step 9: Repeat flicking pencil lines for the flower head using a yellow, green and brown.

(I have used B3, B7 and B8).


Step 10: Still working on the front, shallow perforate using the 5-needle perforating tool outside the main circle, making sure the first 2 needles of the tool goes into the last holes of the previous perforation.

Step 11: On the back, using the 1.5mm ball tool (or Groovi no.2) emboss a circle around the alternate middle hole of the 5-needle perforations
(Don’t worry about the perforations getting squashed as we will be re-perforating all the holes again)

Step 12: From the front, using the 5-needle perforating tool, line up the needles to the holes of the alternate embossed perforations, re-perforate and while the needles are still in the parchment, twist the tool very slightly to the left and then to the right to elongate the holes (Do not twist the tool too much otherwise the middle will fall out).
Using the fine 1-needle perforating tool, re-perforate all the centre holes over the super foam.

Step 13: From the front, with the scissors over the waste, picot cut between all the outside perforations.


To Finish:
Depending on how many layers of backing card and size of card you want, cut each layer slightly larger than the previous one. (I have used 11x11cm purple parchment, 11.5x11.5cm white card and 12x12cm Antarctica designer card).
Attach the parchment piece to the first smallest backing card (if you have used more than one) using brads. Stick this onto the other layers using double sided sticky tape (or glue tape pen).
The layers are stuck on a folded white card measuring 5”x5”. using double sided sticky tape (or glue tape pen).
Sign your card on the back, turn it round, admire and be proud of your creation.


I hope you enjoyed this step by step journey and I look forward to seeing all your #sayitwithflowers creations using these Groovi plates (and others). 

Groovi plates and ingredients are available on  http://www.claritystamp.com. Look out for more of Linda’s 123 plates which are all very beautiful as is all her work.

Sending everyone STAY SAFE WISHES sprinkled with PERGA GLITTER. Take care.

Lots of Love, Hugs and Laughter
Tina x

P.S. The cake I baked was Lemon Coconut!


Thursday 14 April 2022

Say It With Flowers

Hiya ... 

How is everyone doing?

So it has been over a year since my last blog! Is that a long time? Or, relatively speaking, with all the events in our personal lives and all the world events that have happened in the year, a short time?

I took a break from so many things as there as absolute chaos in my personal life and my mind was all over the place. I think this photo of one of my art journal pages describes how my mind was (on a lot of days, it still is!) ...


There is light, there is dark, things I'm happy with, things I'm not happy with, things that keep going round in circles and a journey that weaves in and out of the circles which bend, curve and occasionally things go in straight lines between all these twists and turns. Are your lives similar?

The good news is (for me it is great news) I have rejoined the Claritystamp team. It's like coming home ... A great feeling. I'm hoping ('hope' being the keyword here!) to do more step by step blogs, FB lives (who remembers the FB live "Let's make a tag" sessions?), workshops, designing, etc ... Let's see how things work out but I think the key may be start to slowly. Most days are pretty much "One Moment at a Time, One Day at a Time"

So here is my first step by step offering seeing as Spring is here, the sun is out, flowers and butterflies are beginning to appear which all make each day so much lighter and happier so I'm #sayitwithflowers ...


Groovi Plates:
Groovi Plate Starter Kit Deluxe  GRO-SK-40571-XX
Alphabet & Numbers A4 Square Groovi Plate Mate  GRO-WO-40875-21
Nested Squares Picot Cut Die Set & Groovi Plate  ACC-DI-30698-66
Tina's Primrose & Alliums Floral Delight A5 Square Groovi Plate  GRO-FL-41332-03
Tina's Doodle Hearts 1 Groovi Border Plate  GRO-PA-40849-09
Rome - Italian Cities Diagonal Lace Grid Duets A5 Square Groovi Plate  GO-GG-41583-03

 Step 1: Die cut the 4th largest nested picot square on regular parchment paper using the Nested Squares Picot dies. Emboss the double outline from the matching Nested Picot Squares Groovi plate using the 1mm embossing ball tool (or Groovi No.1).
Find it Here

Step 2: Emboss the large primrose, stem and leaf, doodle stem on the right side of the primrose, stem and leaves, the 2 small swirls and border from the Tina's Primrose & Alliums Floral Delight plate using the Pergamano 1.5mm embossing ball tool (or Groovi No.2) for the circles and the rest of the design using the Pergamano 1mm embossing ball tool (or Groovi No.1).
Find it Here

Step 3: Remove the parchment from the Groovi plate. Move the parchment around the plate to emboss the small primrose, stems, leaves, doodle stems, butterfly and border.

Step 4: Emboss the hearts and scallops from Tina's Doodle Hearts 1 border plate using the Pergamano 1mm embossing ball tool (or Groovi No.1).
Find it Here

Step 5: On the opposite side of the hearts, emboss the scallops border.

Step 6: Still working on the back, between the 2 borders, colour using Perga Liner B pencils.

Step 7: Blend using Dorso oil and blending nibs.

Step 8: Colour in the rest of the design elements using Perga Colours Exclusive pens.

Step 9: Freehand emboss in the circles using the Pergamano 3mm and 1.5mm embossing ball tool (or Groovi No.2 and 3).

Step 10: Very often I like to thread ribbon on my parchment work. Josies's Rome (find it Here) plate has slots within the design which can allow you to do this. I have created a longer template of the slots that I keep in my template folder which I take out to help me decide how many slots I may need on my samples and where to align the slots on my work. I perforated the holes using the bold 1-needle perforating tool.

Like here ...
P.S. To thread ribbon through the slots, you will need an even number of slots so if you start weaving from the back, you end on the back.

Step 11: Once I'm happy with where I want to perforate the holes over the Groovi plate, I remove the template. On the front, perforate the slots using the bold 1-needle perforating tool.

Step 12: Remove the parchment from the Groovi plate, move it along and realign it over the grid to perforate more slots.

Step 13: Remove the parchment from the Groovi plate, turn both the Groovi plate and the parchment to emboss the dots around the slots using the Pergamano 1.5mm embossing ball tool (or Groovi No.2).

Step 14: From the front, perforate inside the flowers, hearts and outside the scallop on the right using the Pergamano bold 2-needle perforating tool.

Step 15:Picot cut between all the perforation using parchment scissors or Perga cutter.

To Finish: Add a bit (or a lot) of sparkle using Perga Glitter and thread a ribbon in the slots. Mount all the parchment piece on 2 squares of designer paper (I used Northern Lights) with white card sandwiched between the 2 pieces using brads. Stick this on 6"x6" folded white card. Use mini glue dots, over the threaded ribbon, stick a bow on the card.


I hope you enjoyed this step by step journey and I look forward to seeing all your creations using these Groovi plates (and others).

Groovi plates and ingredients are available on  http://www.claritystamp.com.

Sending everyone STAY SAFE WISHES sprinkled with PERGA GLITTER. Take care.

Lots of Love, Hugs and Laughter
Tina x