Hiya. How is everyone? Here, in London, it has been glorious sunny days ... A bit too hot but still I'm enjoying my bones defrosting. And it gives me a perfect excuse to eat more ice-cream!
Yesterday I went to the East Northants Groovi Group after almost 2 years and I cannot explain in words how lovely it was to meet with old and new friends in person, receive all those hugs (and trust me they were very much needed and appreciated) and love. Alongside lots of chatting and giggling there was absolutely delicious pineapple cake, baked by Jean Page, and vanilla ice cream made by Rosalind McLellan. A massive thank you them, my Groovi Girls and everyone because you all made my day so very special. I made lots happy memories. Thank you.
I had a little play with Linda Williams Easy Layout Groovi plates a few days ago. Oh my golly gosh, they are such a clever fantastic idea, easy to use and fun! I had not seen the previous collections as I was on a break from the crafting world but now that I have these, I need more as I think it is going to become an addiction. I could use any on my other Groovi plates within the layouts to create beautiful cards.
Another thing I had not come across till recently were Josie Davidson's Embossed Pattern Groovi Plates. Another brilliant idea and I love love love these. Life has just become so much easier and a lot more fun. Another addiction!
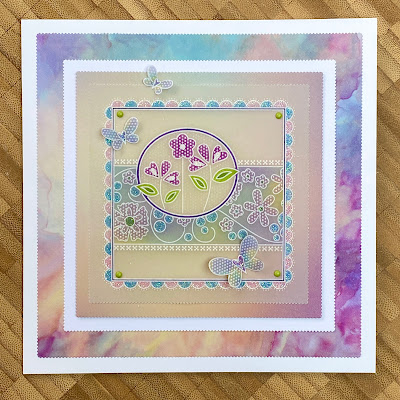
This was the one I have created using some of the easy layout plates and embossed pattern plates...

Groovi Plates:
Deluxe Groovi Plate Starter Kit + Butterfly Wreath A5 Square Plate GRO-SK-40709-XX
Linda Williams Love is All That Matters Easy Layout A5 Square Groovi Plate GRO-LO-41663-03
Linda Williams Live Simply, Bloom Wildly Easy Layout A5 Square Groovi Plate GRO-FL-41665-03
Linda Williams A Friend To Me Easy Layout A5 Square Groovi Plate GRO-FL-41662-03
Josie's Diagonal Embossed Patterns 1 A4 Square Groovi Plate GRO-GG-41733-24
NOTE:
All the embossing on this project is done on the back.
The colouring on this project is done on the back.
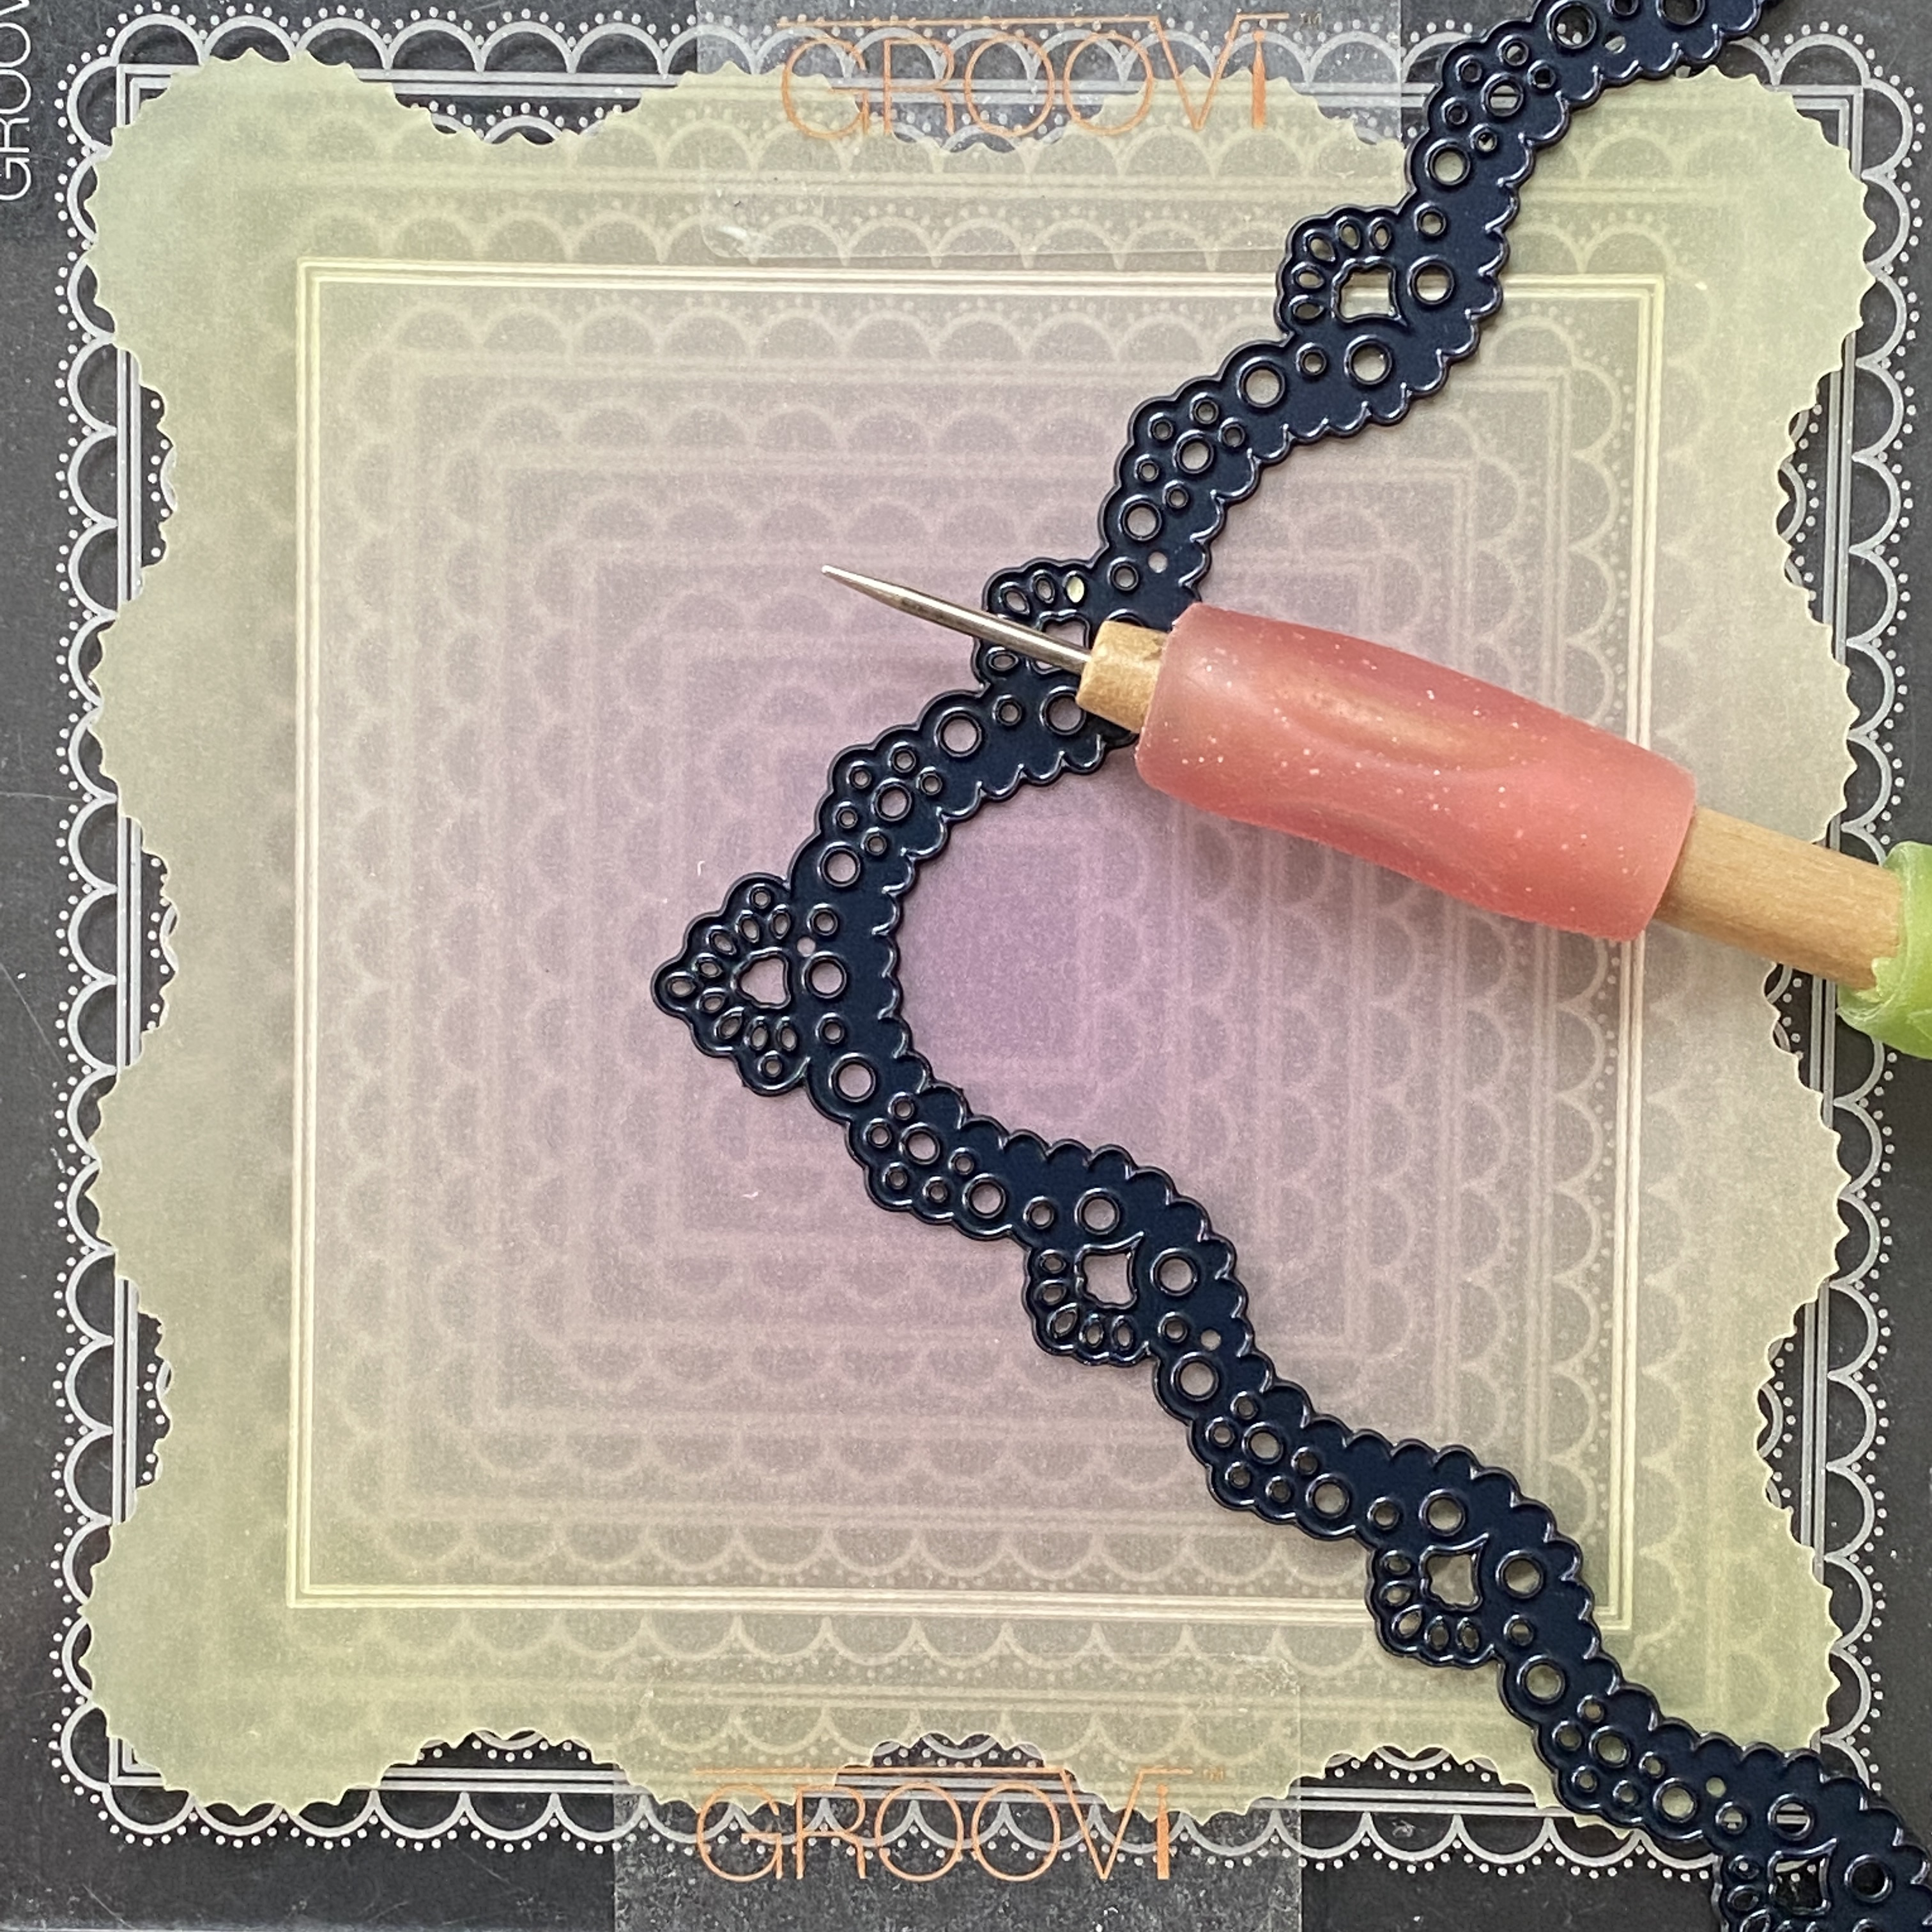
All the perforating and cutting on this project are done from the front.
Step 1. Over the Love is All That Matters Groovi Plate, emboss the outside square and inner most border curve on the regular parchment using the Groovi No.1 tool (or Pergamano 1mm embossing ball tool).


Step 3: Over the Love is All That Matters Groovi Plate, on rainbow parchment (I have used Lemon Sorbet Sunrise), with the glossy brighter side facing up (this is the back of the work), emboss the 3 border curves and hearts and part of the outside square using the Groovi No.1 tool (or Pergamano 1mm embossing ball tool).


Step 5: On a spare piece of regular parchment, emboss the square using the Groovi No.1 tool (or Pergamano 1mm embossing ball tool) and dots using the Groovi No.2 tool (or Pergamano 1.5mm embossing ball tool)

Step 6: In the middle of the circle, emboss the words and floral design from the Groovi plate. Emboss the circles using the Groovi No.2 tool (or Pergamano 1.5mm embossing ball tool) and the rest of the line art using the Groovi No.1 tool (or Pergamano 1mm embossing ball tool).

Step 7: In the space above and below the words and floral design, emboss the pattern dots using the Groovi No.2 tool (or Pergamano 1.5mm embossing ball tool).

Step 8: In the section above the border curves, over the A Friend To Me Groovi Plate, emboss the full design (except the butterfly) using the Groovi No.1 tool (or Pergamano 1mm embossing ball tool).


Step 14: From the front, over the super foam, using Pergamano bold 2-needle perforating tool, perforate inside the border curves and hearts and outside these 3 the pieces.
Step 9: Using the Groovi No.1 tool (or Pergamano 1mm embossing ball tool), emboss the butterfly on the spare section of the rainbow parchment.
Step 10: Using the white end of the eraser pencil, remove the colour of the parchment in the flowers, leaves and butterflies.
Step 11: Using the Groovi No.2, No.3 and No.4 tools (or Pergamano 1mm, 1.5mm and 3mm embossing ball tools) emboss inside floral circles, fuchsia stamen and butterfly.
Step 12: Still working on the back, colour using Perga Colours Exclusive pens.
Step 13: On the back of the regular parchment piece, colour in the panels using the Perga Liner B pencils. Blend the colours using a little Dorso oil on a sponge and a blending nib. Use a different nib for each colour if possible. If you have too much oil on your nib, the colour will come off, so blot off the excess on a piece of kitchen towel. If you have too little oil, the blending will not be smooth, so touch just the very tip of the nib on the Dorso oil for the tiniest amount of oil.
Picot cut between all the perforations making sure the scissors are over the waste when you cut.
To Finish: Cut the parchment piece with Josie's grid pattern slightly larger than the rainbow parchment piece. Layer and mount the little regular parchment piece, the rainbow parchment piece, the grid pattern piece and the rainbow paper using brads. Stick this on folded white card. Stick the butterfly on the card using a teeny tiniest amount of Perga glue on the back of the butterfly body.
My life is pretty good at the moment as it has the Easy Layout plates, Embossed Pattern plates, Rainbow parchment and Ice Cream.
I hope it all makes sense and you get to have lots of fun.
Groovi plates and ingredients are available on http://www.claritystamp.com.
Sending everyone STAY SAFE WISHES sprinkled with PERGA GLITTER. Take care.
Lots of Love, Hugs and Laughter
Tina x