
Groovi Plates and Fresh Cut Dies used:
Nested Squares Picot Cut Die Set & Groovi Plate - ACC-DI-30698-66
Tina's Christmas Rose - GRO-CH-41292-03
Tina's Christmas Centrepiece - GRO-CH-41291-03
All the embossing and colouring has been done on the back and all the perforating and picot cutting has been done on the front.
1.) Picot cut the 2nd from outside square using the nested squares picot cut die and emboss the corresponding double square outlines from the corresponding Groovi plate.
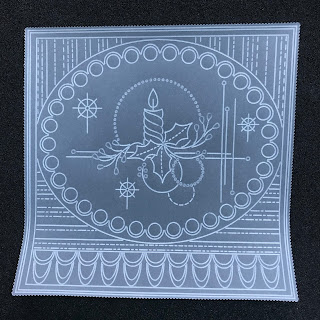

2.) Emboss the inner square border from the Christmas Rose plate and the lace design at the bottom of the square.

3.) Emboss the rest of the design from Christmas Centrepiece plate.

4.) Emboss inside the little circles and leaves.

5.) Colour on the back using Perga Liner B pencils and blend with Dorso oil using blending nibs.

6.) From the front perforate using the bold 2-needle tool in the circles around the oval and in the lace design.

7.) Picot cut between all the perforations.

8.) On a separate piece of parchment, emboss 5 flowers from the Christmas Rose plate, freehand emboss the little circles and colour. Cut the flowers out.

9.) To finish, mount the parchment piece to Northern Lights designer paper and white card using brads through the flower centres. Stick this on another piece of Northern Lights designer paper and folded white card. Add a bit of sparkle on the circles, stars and hearts using sticky ink, mapping pen and Perga glitter.

If you missed the show, you can watch it on rewind at http://www.hochanda.com/cinema/36183
All the products can be purchased from https://claritystamp.com
Enjoy. Take care.
Love and Laughter
Tina